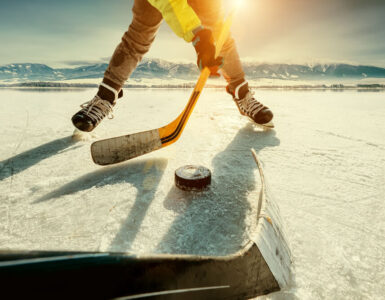
You’ve saved up and bought your dream hockey skates. You can’t wait to get out on the ice and start skating, so you lace up those bad boys and head out to play ice hockey. Things are going okay, except that the skates are stiff and very uncomfortable.
That’s not surprising, we all know that new shoes of any type need to be broken in. Your skate also needs time to mold to the shape of your foot—but what if you didn’t have to wait? What if there was a way to get those skates fitting perfectly from the outset?
Baking your skates could well be the answer for you if you do it correctly. In this post, we’ll go through whether you should bake your skates, how to do this, and what benefits there are to baking the skates.
Contents
- 1 Do You Have to Bake Ice Hockey Skates?
- 2 Wearing Them In
- 3 Using a Hairdryer On Ice Hockey Skates
- 4 Baking Your Ice Hokey Skates
- 5 How Long Should You Bake Your Ice Hockey Skates?
- 6 Ice Hockey Skates with Pumps
- 7 Can You Bake Used Ice Hockey Skates?
- 8 Can You Bake Ice Hockey Skates More Than Once?
- 9 The Benefits of Baking Your Ice Hockey Skates
- 10 Final Notes
Do You Have to Bake Ice Hockey Skates?
Before we get to baking, it’s important to realize that fit is still the most critical factor. No brand new pair of skates is going to be completely comfortable, but the right -pair should feel okay on your feet. That means trying on a few different brands and choosing the one with the most comfortable fit.
We’d even go so far to recommend getting the salesperson at the store to help you get the exact right size. We tend to get into a rut when it comes to footwear. After all, it’s the one area of our body that doesn’t really change much over the years.
If you were a size 10 when you left school, you’d still be the same size when you retire. The size of your feet may not change, but footwear does. Some brands are cut on the small size, and some are narrower.
The point is that you should get your feet measured so that you exactly what size you should be trying on. Getting the salesperson to help you with this makes sense because they’ll know more about the brands and how they fit.
All baking skates does is make them more malleable. You’ll put them while they’re still warm so that they mold to your feet. It can’t affect the structure of the skate itself.
Back to the original question, though, do you have to bake your skates? The answer is, “No,” you can also wear them in. In the rest of this section, we’ll look over both options.
Wearing Them In
The problem with wearing skates in is that it means you’ll have to put up with the stiffness for around five or six skating sessions. The skating boots are very stiff, and so it’s going to hurt a bit. We’d recommend putting a plaster on the back of the heels to prevent blisters.
It might also be helpful to wear a couple of pairs of socks to start with. If you’re in a sport, we recommend getting this over and done with during practice sessions and in plenty of time for competitions. You don’t want to be distracted by pain during an event.
Using a Hairdryer On Ice Hockey Skates
Maybe you’re not convinced about sticking your brand-new pair of skates in the oven. We admit that there are risks in doing so. If you leave them in the oven for too long, you could weaken the glue that holds the sole in place. If you put the oven up too high, you might even melt them.
With our tips further down, this is not going to happen, but if you’re still concerned, you can use a hairdryer to heat the inside instead. The heat from the hairdryer will help to soften the material on the inside. While it’s still warm, you can slip your feet in and lace them up. That will help them to take on the contours of your feet.
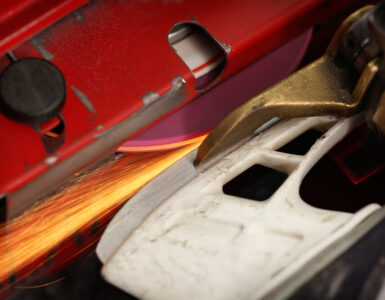
Baking Your Ice Hokey Skates
However, oven baking is the surest way of getting the right fit. If you go into a sport’s shop and buy your skates in person, you might even find that they’ll offer to bake them for you. We’d recommend setting aside some time to it this way. Just make sure that you’re wearing the right socks and that you don’t have to rush off afterward.
Let’s be clear here, though – it’s not possible to heat mold every type of skate. Do speak to the salesperson first about whether the set you’re buying can handle the heat. A good rule of thumb, though, is the cheaper the shoe, the more likely baking will damage them.
If you’re buying high-end models, you’re fine – the manufacturers factored in that they might be baked. Lower end, or beginner models, however, are not ideal for use with this technique. In these models, the heat will cause the materials to start deteriorating. This will lead to an overall decrease in the lifespan of the skates. If you’re not sure which camp your new pair fits into, ask the salesperson you bought them from, or contact the manufacturer.
How Long Should You Bake Your Ice Hockey Skates?
Okay, you’ve checked, and your new pair can take the heat. Are you ready to learn how to get them to fit perfectly? Let’s go through the process step by step.
Before we do, though, we’d like to issue a couple of warnings:
- If applicable, speak to your parents first and explain why this step is necessary. They might not understand why you’re putting the expensive pair of skates they bought you into the oven—and, if your mom walks in to see this without being forewarned, you’ll have problems.
- Make sure that the materials are thermoformable. If you have a carbon-composite model, for example, you might find that special treatment is required. If that’s the case, rather get the salesperson to help you. If you’re not sure, ask before you buy.
- Keep your eyes glued to the oven. It’s boring as all get out, but it’s also essential—it’s only for a short while. There’s a danger that if you get distracted, you might leave them in too long. Also, if you’re watching them, you can see if they’re starting to melt or coming apart.
- Now go onto the manufacturer’s website and see what temperatures they recommend you use. You also want to check how long they recommend them being in the oven for. We’ve got some basic advice below but stick with the manufacturer’s instructions if they differ.
Step 1: Preheat the Oven
We’re using a low heat here, so heat your oven to 180° F or 80° C. It takes about ten to fifteen minutes to get to the right temperature. As all ovens are different, you need to know whether your oven runs hot or cold.
A good trick to make sure that it is at the right temperature is to place an oven-proof container of water in the oven when you switch it on. You can then confirm that the temperature is correct by reading the temperature of the water. Again, it’s a nuisance, we know. It’s not strictly necessary to confirm the temperature as long as you know that your oven is in good shape.
Step 2: Prep Your Skates
Start by making sure that your skates are completely clean. If you need to wash them for some reason, make sure that they are dry before you start.
The rest of the prep is more about ensuring that the skates can be slipped on as easily as possible when they come out. Do a dry run quickly by loosening the laces and ensuring that they slip on and off without too many hassles.
The laces can usually stay in the shoes the whole time unless they are waxed. If they are waxed, they need to be taken out beforehand so that the wax doesn’t melt. If that happens, it could melt onto the skate and be very difficult to remove.
If this is the case, replace them with another pair of old laces so that you don’t have to waste time lacing them up again when they are done.
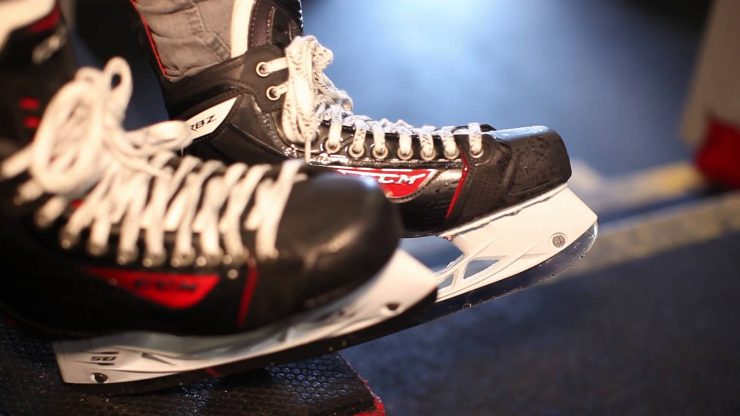
You also need to take the blade cover off and set it aside. The shoe itself might be able to withstand the heat, but this is not likely to be true of the cover. Besides which, there’s no benefit to baking the cover. Do remember, though, that the metal at the bottom is going to be hot when it comes out. So, keep a pair of oven gloves with you when you’re removing them. You don’t want to touch that metal with a bare hand, or you’ll end up with a nasty burn.
We’d also recommend that you place the skates on a baking sheet that has been lined with parchment paper. The sheet should be large enough so that both skates can lay on it side by side and completely flat. If they won’t both fit at once, you’ll have to bake them separately.
The sheet will prevent the grooves of the oven leaving an impression on the skates. This is important because the materials will become more malleable when heated and could take on the shape of things that they’re lying on top of.
If they’re put directly on the oven bars, they could well develop ridges in them. That’s also why they need to be put out flat on the sheet. They shouldn’t overlap the rim, or there could be issues with that causing a mark as well.
Step 3: Gather Everything Else that You Need
You want to get your skates out of the oven and on your feet as soon as possible. This will be difficult if you need to run around looking for different items. You’ll need:
- Your thermometer to check the temperature of the water. An oven or candy thermometer will be just fine. Just make sure that it can handle hot water.
- A timer to make sure that you know exactly when to pull them out. Don’t skip this step. Overcooking your shoes will damage them.
- Oven mitts – don’t skip these, that baking tin will be hot when you take it out.
- Your skates on the baking sheet lined with parchment paper. The parchment paper is not strictly necessary, but if you use the baking sheet for cooking food, it is a good idea.
- Something to protect the floor while you’re walking with the skates on.
- The socks you’ll use for skating. Put these on your feet now, so you’re all ready to go.
Step 4: Switch the Oven Off
Okay, that sounds weird considering that we haven’t even put the shoes in yet. It’s correct, though. We don’t want the skates subjected to direct heat. The elements, to heat the oven space to the right temperature, heat up to higher than the temperature is set.
For this reason, we need to make sure that they are off and have been allowed to cool for a minute or two before putting in the skates.
Step 5: Just Add Skates
We’re now ready to put the skates in. Knowing how long to leave them in for will mean checking the manufacturer’s recommendations. If they don’t give details, leave them in for three or four minutes at most.
Don’t be tempted to go longer than that – the longer you leave them in for, the more chance there is for the glue to come unstuck or the soles to start melting. We recommend placing them in the middle of the oven so that they are not too close to the cooling elements.
Step 6: Wear Your Skates
This part needs to be done relatively quickly, but also with care. The heat will slightly loosen the eyelets, and if you lace the boots up too tight, they could get ripped out. Step into the shoe, and then lace it to a medium tightness.
You’d think that you have to tie them as tight as possible, but this would be incorrect. Remember the eyelets and treat the shoes with care. When lacing, pull outwards on those eyelets, don’t use an up, down, or angled motion.
Now get the other out and repeat. At this point, they won’t be laced as tightly as you would have them during a game, but that’s not going to make much of a difference here. The important part is to get the foot contours molded into place.
Step 7: Stand for a Minute
Stand up for a minute to help create a deeper mold. Stand in one place and don’t bend, or walk, or flex the ankles. Any move that might cause pressure on the eyelets must be avoided, or you could rip them out. Apply firm, downward pressure, without bending your legs for the best results.
Step 8: Sit and Wait for them to Cool
Now sit down, keeping your knees at a ninety-degree angle to the floor. Sit back and relax until the material has cooled down completely. This will take around 15 minutes, depending on how warm the weather is outside. We recommend not rushing this process, if you feel any heat in the skates, keep them on for another ten minutes at least.
Step 9: Take the Skates off and Stow Them
You need to take your skates off and set them aside so that the adhesive can cure fully again. The process of heating them will have made the adhesive more pliable, and that’s why you need to take this extra step.
It’s best to leave them for at least 24 hours. If you’re dying to get out on the ice, though, you can drop this period to 12 hours. You’ll want them to lay down completely flat, out of the reach of small kiddies and pets.
You might be tempted to make things go more quickly. You might think that putting them in the freezer or refrigerator is a good idea. It’s not. Exposing the materials to extremes of heat and cold on the same day will end up leaving them brittle. It’s not worth taking the risk so just don’t do this.
Ice Hockey Skates with Pumps
Most of the time, skates with pumps should not be baked. Check what the manufacturer recommends. If you can bake them, then make sure the pumped-up area is fully deflated before you get started. The rest of the steps are the same.
This time, though, you need to give them 24 hours to rest and should not pump them up before then.
Can You Bake Used Ice Hockey Skates?
This is going to depend on the make and model. If it’s a pair that you can bake, you should be fine with heating them again to get the perfect fit. You’ll follow the same steps that we suggested before, with one exception. Make sure that they are as clean as possible before they go in. This prevents dirt or debris getting baked in.
Can You Bake Ice Hockey Skates More Than Once?
If you have a higher-end model, you’ll get away with heating them three or four times. So, if you find that the new form is not all that comfortable, repeat the steps and try again. You should leave at them for at least 24 hours before heating them again, though.
While higher-end models can be baked a few times, we’d try and keep this to a minimum. The heat will impact the structure of the shoe if this process is repeated too often. While they’ll look the same, the problem is that the ankle supports will start to break down and the bonds will loosen. If possible, heat them once and never again.
If you have a lower-end model, you’re taking a chance baking them once. Even if you do get away with it, don’t try and test your luck again. The materials used in the cheaper models are not nearly as durable and will break down faster.
Rushing the cooling process is an area where a lot of beginners go wrong. We’d recommend not moving the skates for at least 24 hours after they’ve been heated. So, if you have a big game tonight, this is not the time to start molding them.
Remember that even the higher-end models are not designed to be heated multiple times. If you are not careful, you could find that you’ll need to buy a new pair sooner rather than later—and that means going through this whole process again.
The Benefits of Baking Your Ice Hockey Skates
Okay, so if it’s risky to heat the boots, why risk it at all? There are a few reasons, and we’ll go through these briefly:
- By heating your skates, you make them more malleable, and this helps shape the sole to the shape of your foot. You’ll get the perfect fit and be able to feel a lot more comfortable while playing.
- Higher-end models are designed knowing that this is what most people will do. The manufacturers actually recommend popping your new models into the oven.
- It’s a great way to fit skates that are second-hand. The problem with second-hand shoes is that they will typically have molded to the shape of the previous owner’s feet. Baking them can help them readjust to your contours.
- Without following this process, you have to break the boots in while you’re using them. As they’re pretty stiff to startoff with, this can be a rather painful experience. With this, you’ll only need a few skating sessions before they are completely comfortable.
Final Notes
Whether you’re going to stick your new skates into the oven or not is up to you. We recommend getting the advice of the salesperson before you make your final decision. As a good rule of thumb, most professional level models will respond well to this treatment.
If you’re concerned about getting it wrong, our recommendation is to take it slowly or consider asking your sport’s shop to help you out. Baking the skates can help to create a much better fit for your feet. It short-circuits the process of breaking them in, so you get to go full ball sooner rather than later.